
A local move packing checklist is a structured plan that outlines what to pack, when to pack it, and how to protect your belongings for a short-distance relocation. It includes supplies, room-by-room tasks, labeling systems, and specialty-item prep. The result is fewer breakages, faster loading, and a calmer move day.
By Let’s Start Moving • Last updated: 2026-06-30
At a Glance: What You’ll Get
Use this local move packing checklist to plan weeks ahead, choose the right supplies, protect fragile and specialty items, and decide where professional packers add value. You’ll get timelines, room-by-room lists, a DIY vs pro comparison, and a buying guide you can act on today.
- Actionable 6-week timeline and room-by-room lists
- Buying guide for boxes, wraps, and protective materials
- DIY vs. professional packing comparison table
- Labeling and inventory systems that prevent lost items
- Specialty-item prep: pianos, appliances, treadmills, hot tubs
- How our trained, licensed, and insured teams can help
Your Local Move Packing Checklist, Built by Pros
A pro-built packing checklist breaks work into small, clear tasks, sets weekly goals, and standardizes supplies and labels. That structure reduces last-minute scrambling, protects valuables, and helps movers load efficiently so your move stays on schedule.
Let’s Start Moving specializes in end-to-end relocations with professional packing, quality supplies, and careful transport handled by trained, licensed, and insured crews. We also manage small moves and complex specialty items so you can focus on the life change, not the logistics.
Introduction: Why Packing Smart Wins Move Day
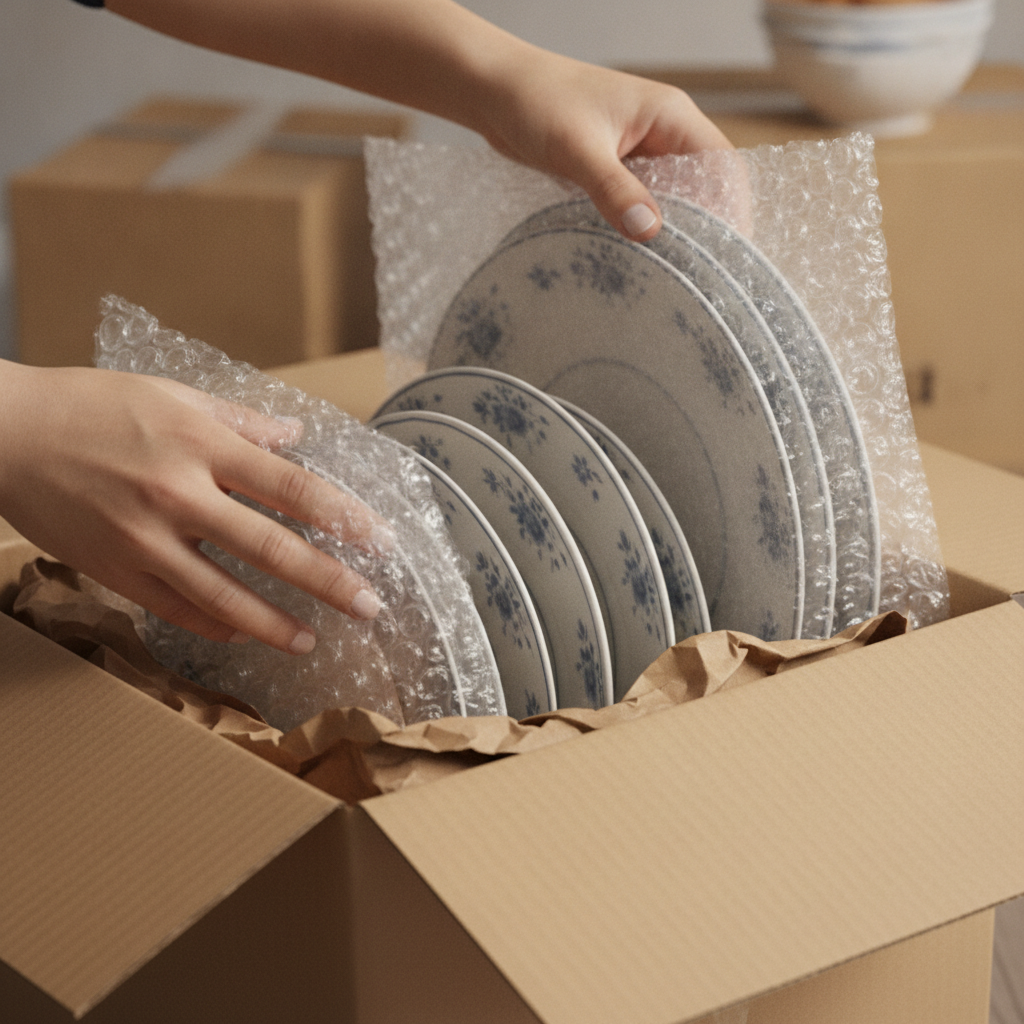
Packing drives the speed, safety, and predictability of your move. When items are boxed right and labeled clearly, movers load faster, fragile goods stay intact, and unpacking is simpler—saving time and stress.
Most moving delays don’t start on the truck—they start at the packing table. We’ve found that standardized box sizes, firm cutoffs for “what gets packed when,” and a simple two-code label (room + contents) eliminate the most common bottlenecks.
- Predictable timing: Pack by weekly milestones to avoid last-minute crunches.
- Fewer damages: Use right-size boxes and cushioning; keep weight balanced.
- Faster unloads: Room-first labeling directs boxes to the correct spaces immediately.
- Less decision fatigue: Pre-commit to what you’ll donate, discard, or keep.
DIY Packing vs. Professional Packing: Quick Comparison
DIY packing gives you control and flexibility; professional packing adds speed, consistency, and better protection for fragile and specialty items. Use this comparison to decide where pros are worth it and where DIY makes sense.
| Factor | DIY Packing | Professional Packing (Let’s Start Moving) |
|---|---|---|
| Speed & consistency | Variable, depends on your time | Trained packers finish faster with uniform methods |
| Protection for fragile items | Good if you follow best practices | Optimized cushioning, dish packs, wardrobe & mirror boxes |
| Specialty items (pianos, appliances) | Requires research and equipment | Handled by specialists with proper tools and techniques |
| Labeling & inventory | Manual systems; quality varies | Standardized room codes, contents, and priority flags |
| Your time investment | High; evenings/weekends | Low; packers complete most tasks in less time |
Use a hybrid model: DIY on linens, books, and clothing; hire pros for kitchens, art, mirrors, and anything heavy or delicate. This approach balances control, protection, and your time.
The Process: 6-Week Local Packing Timeline
Start six weeks out. Declutter first, then pack least-used areas, moving toward daily-use rooms. In the final week, close out rooms, prep a first-night kit, and stage labeled boxes by room near the exit.
Week 6: Decide, Declutter, and Gather Supplies
- Decide what to keep, donate, or recycle; set firm categories.
- Gather core supplies: small/medium/large boxes, dish packs, wardrobe boxes, tape, paper, bubble wrap, stretch wrap, markers.
- Create a simple label key: room code + brief contents (e.g., KITCH – pans).
Week 5: Off-Season and Storage Areas
- Pack storage spaces, guest rooms, and off-season clothing.
- Group items by function (sports gear, holiday décor) for easier unpacking.
- Flag any oversized or heavy items for professional handling.
Week 4: Books, Décor, and Spare Linens
- Use small boxes for books; keep weight reasonable and fill gaps with paper.
- Wrap décor and frames; place standing vertically with padding between items.
- Set aside hardware and screws in labeled zip bags for any disassembled pieces.
Week 3: Kitchen Part 1 and Kids’ Extras
- Pack rarely used kitchen appliances and glassware with bubble wrap or foam pouches.
- Box kids’ extra toys and seasonal items; keep favorites accessible.
- Start an inventory sheet: box number + contents + room.
Week 2: Closets, Bathrooms, and Media
- Use wardrobe boxes for hanging clothes; tape shoes in pairs inside the box.
- Pack towels and linens around fragile bathroom items for extra cushioning.
- Coil cables and label each with painter’s tape (TV, modem, console) to speed setup.
Week 1: Kitchen Part 2, Daily Rooms, and First-Night Kit
- Finish kitchen: plates vertically, glassware in dividers, heavy items at bottom.
- Consolidate daily-use items; switch to a minimal setup.
- First-night kit: meds, chargers, basic tools, toiletries, two days of clothes, snacks.
Moving Day: Stage and Walk-Through
- Stage boxes by room near exits; keep hallways clear for dollies.
- Do a final walk-through; confirm that high-priority boxes are loaded last and unloaded first.
- Protect floors and doorframes; ensure pets are secured.
Packing Supplies Buying Guide: What to Get and Why
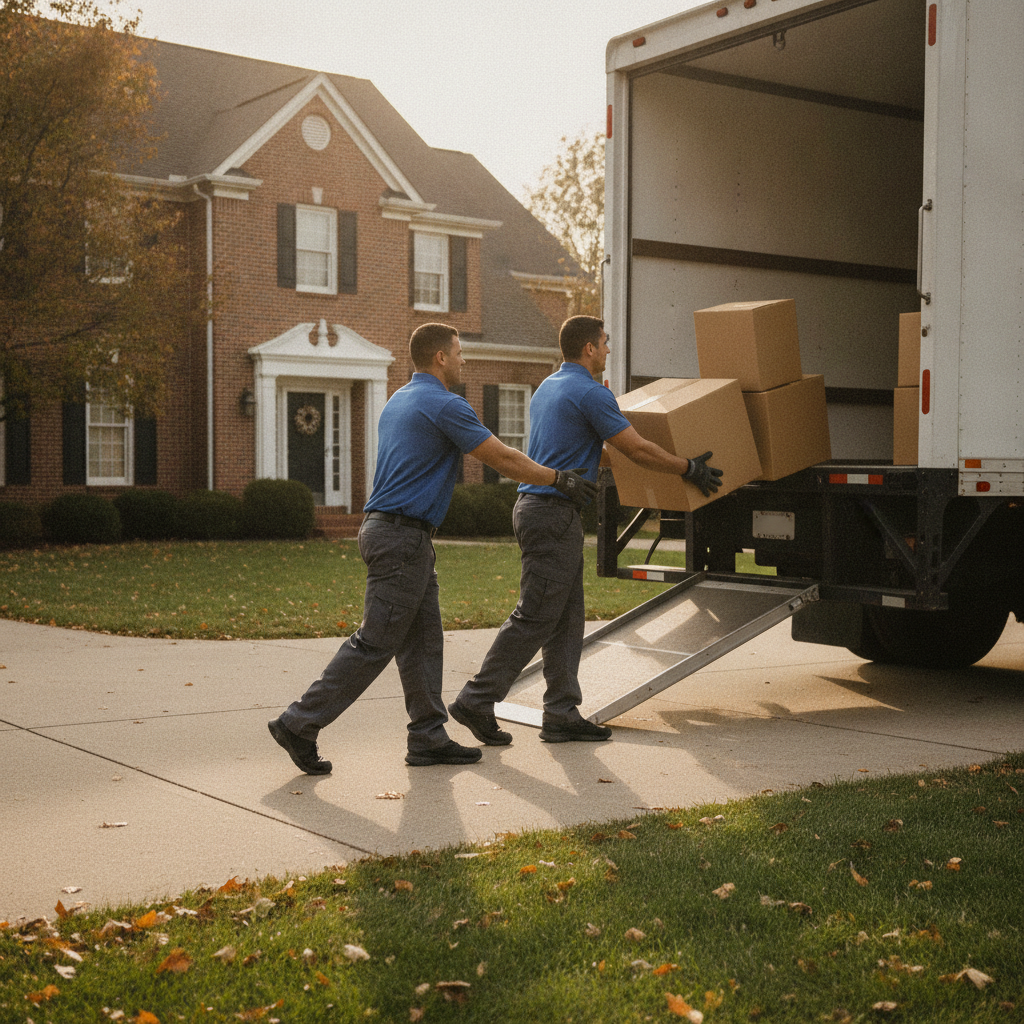
Use sturdy, uniform boxes in small, medium, and dish/wardrobe sizes. Combine paper and bubble wrap for cushioning, and reinforce seams with quality tape. Consistency speeds stacking, protects items, and reduces trips.
Boxes (Choose Strength and Size Wisely)
- Small boxes (books/media): Prevents overloading; easier to carry.
- Medium boxes (kitchen/linens): Most versatile; balance weight and volume.
- Dish packs & cell kits: Vertical protection for plates and glassware.
- Wardrobe boxes: Keep clothes on hangers and maintain shape.
Cushioning & Protection
- Packing paper: Scratch-free filler for dishes and décor.
- Bubble wrap or foam sleeves: Impact absorption for glass and electronics.
- Stretch wrap & moving blankets: Furniture protection; prevent door/drawer swing.
Sealing & Labeling
- Quality packing tape: Reinforce bottoms; use H-tape method on seams.
- Thick markers & color dots: Room code + contents + priority (e.g., Open First).
- Zip bags: Contain hardware, screws, cords; tape to parent item.
For deeper context, review an industry checklist like this packing for a move guide and a broader moving preparation checklist for planning touchpoints you might have missed.
Fragile and Specialty Items: Proven Protection Methods
Pack fragile items with layers of paper and bubble wrap, using snug boxes and vertical placement. For specialty items like pianos and appliances, trained crews use pads, straps, and custom equipment to protect weight-bearing points.
- Kitchens: Plates vertically in dish packs; glass dividers; heavy items on bottom.
- Frames & mirrors: Corner protectors; mirror boxes; do not lay flat.
- TVs & monitors: Original box if available; otherwise, foam corners and screen savers.
- Pianos: Disassembly as required; pads, skids, and straps; protect pedals and keys.
- Appliances: Secure doors; protect lines; keep upright for compressors.
- Fitness equipment: Remove consoles; bundle hardware; pad load-bearing joints.
- Hot tubs: Drain fully; protect control panel; plan clear egress for dollies.
Our teams specialize in piano moving, appliance moving, couch moving, treadmill moving, and other high-risk items. We bring the right tools and methods so your heavy or delicate pieces arrive safely.
Packing Services We Offer for Local Moves
We deliver full-service packing, partial packing for complex rooms, and specialty-item handling. Trained, licensed, and insured crews bring professional supplies, standardized methods, and a video-quote option to right-size the plan.
- Full-service packing: We pack every room using uniform materials and labels.
- Partial packing: You handle simple rooms; we secure kitchens, art, mirrors, and décor.
- Specialty-item moving: Pianos, appliances, treadmills, hot tubs—handled with dedicated equipment.
- Residential and commercial: Homes, apartments, offices, warehouses, inventory.
- Packing supplies & materials: Quality boxes, dish packs, wardrobe boxes, wraps, and pads.
- Video quote: Fast virtual assessment to plan labor and materials.
- 24/7 support: Flexible scheduling and responsive coordination.
Labeling and Inventory Systems That Prevent Chaos
Use a two-code label (room + contents) on two sides and the top of each box. Number boxes per room, and keep a simple inventory sheet. This ensures the right box reaches the right spot fast.
- Room-first labeling: Example: KITCH, BED1, LIVING.
- Contents shorthand: 1–3 words: “pans,” “toiletries,” “winter coats.”
- Priority flags: Color dots or “Open First” for essential boxes.
- Box numbering: BED1-01 to BED1-12; cross-reference to inventory.
- Hardware bags: Tape to parent furniture and list in inventory.
Simple systems beat complex apps on move day. Paper inventory sheets and clear markers keep everyone aligned, including your movers and any helpers.
Quick Check: Do You Want Packing Done Right?
If you want speed, consistency, and better protection, bring in trained packers for the hard rooms and heavy items. You’ll still control what matters while avoiding the most common pitfalls.
Soft CTA: Book a short video walk-through and we’ll map your packing plan, identify specialty items, and align supplies. No pressure—just clear next steps tailored to your timeline.
How We Scope and Quote Packing Support
We scope by volume, access, fragility, and specialty items—then align crew size and materials. A quick video quote helps right-size the plan and anticipate constraints before move day.
- Volume & item mix: Box counts by room; fragile density (glass, art, electronics).
- Access: Stairs, elevators, hallways, and parking constraints.
- Specialty items: Pianos, appliances, fitness equipment, hot tubs.
- Timeline: Preferred move day; windows for packing and loading.
- Support model: Full-service, partial, or specialty-only.
Curious how others frame a local move? This practical local moving services overview outlines service scope considerations that mirror the most common planning factors.
Why Choose Us
We combine licensed, insured crews with 10+ years of experience, standardized methods, and 24/7 support. Our teams handle small moves and complex pieces with the same care, delivering smooth, secure packing and loading.
- Experienced teams: Trained packers who use proven methods and materials.
- Customized plans: We tailor packing scope to your timeline and rooms.
- On-time execution: Optimized loading sequences and clear staging.
- Transparent approach: Clear expectations and no last-minute surprises.
- Specialty expertise: Pianos, appliances, treadmills, hot tubs, and more.
- Always-on support: We’re responsive when plans change.
Who We Serve for Local Moves
We support homeowners, renters, families, and businesses planning short-distance relocations. From small apartments to offices and warehouses, we adapt crews and supplies to the environment and item mix.
- Homes and apartments preparing for quick turnarounds
- Offices consolidating equipment, records, and workstations
- Warehouses and inventory moves with labeled pallets and racks
- Customers needing partial help in high-complexity rooms
What Customers Say
Customers appreciate organized crews, careful packing, and clear communication. They highlight how standardized labels and room-first staging make unloads and first-night setup easy.
- “The kitchen and fragile items arrived in perfect condition. Labels made unpacking easy.”
- “They handled our treadmill and appliances safely and finished faster than expected.”
- “Video quote was quick and accurate; the plan matched our timeline precisely.”
Room-by-Room Local Move Packing Checklist
Pack least-used rooms first and daily-use rooms last. Use small boxes for heavy items, and label every box with room and contents. Keep essential items accessible.
Kitchen
- Plates vertically in dish packs; glassware in cell kits; cutlery bundled.
- Small appliances: secure cords; original packaging if available.
- Pantry: check expiration dates; pack cans in small boxes.
Living Room
- TV and electronics: protect screens; coil and label cables.
- Frames and mirrors: corner protectors; mirror boxes; do not lay flat.
- Books and décor: small boxes; pad with paper to prevent shifting.
Bedrooms
- Wardrobe boxes for hanging clothes; fold and bag off-season wear.
- Mattress covers; disassemble bed frames; bag and tape hardware.
- Nightstand items in small boxes; keep essentials in first-night kit.
Bathrooms
- Seal liquids in zip bags; tape lids; cushion glass bottles.
- Towels as padding; pack toiletries last for access.
- Medication stays with you in the first-night kit.
Garage/Storage
- Group by category (tools, sports, gardening); secure sharp edges.
- Drain fuel from equipment; remove batteries where applicable.
- Use clear bins for hardware and small parts; label thoroughly.
Common Packing Mistakes to Avoid
Avoid overloading large boxes, mixing rooms, and skipping labels. Don’t leave heavy items loose, and never pack flammables. Set cutoffs so daily-use rooms wrap up 24 hours before loading.
- Large boxes too heavy to lift safely.
- Mixed-room boxes that slow unloads and cause lost items.
- No inventory or numbering system.
- Loose hardware and cables that get separated from parent items.
- Ignoring access constraints (elevators, parking) in staging plans.
Key Takeaways
Plan six weeks out, use consistent supplies, label every box with room and contents, and bring in pros for fragile or specialty items. These four habits eliminate most delays and damages.
- Start early and pack by weekly milestones.
- Standardize boxes, cushioning, tape, and labels.
- Use room-first labels and simple inventory sheets.
- Let trained packers handle kitchens and specialty items.
Local Move Packing Checklist: FAQ
These quick answers address the most common packing questions: timelines, what to pack first, how to label, and which rooms benefit most from professional help.
When should I start packing for a local move?
Begin about six weeks before move day. Declutter first, then pack least-used rooms and seasonal items. In the final week, finish daily-use rooms, prep a first-night kit, and stage labeled boxes near exits for efficient loading.
What should I pack first?
Start with storage areas, guest rooms, books, décor, and off-season clothing. Save high-use rooms—kitchen, bathrooms, and bedrooms—for the last week so daily life stays functional while you work through the list.
How do I label boxes so unpacking is faster?
Use a two-code label (room + contents) on two sides and the top: for example, KITCH – pans. Number boxes per room and keep a simple inventory sheet so every box lands in the correct space and essentials are easy to find.
Which rooms should professionals pack?
Hire pros for kitchens, fragile décor, mirrors, art, and any heavy or specialty items like pianos, appliances, treadmills, or hot tubs. You can DIY on linens, books, clothing, and simple bedrooms to balance effort and protection.
Do I need special boxes for TVs and glassware?
Use original TV packaging if you have it; otherwise protect screens with foam corners and pads. For glassware and dishes, choose dish packs with cell dividers and wrap each piece with paper or bubble wrap for impact protection.
Ready to Pack Smarter?
Get a tailored plan in minutes. Our video-based walk-through maps your packing scope, identifies specialty items, and aligns crew and supplies so move day runs smoothly.
Let’s Start Moving can pack your toughest rooms, protect delicate pieces, and coordinate load-in so everything arrives organized. Tell us what you’ll DIY and where you want backup—we’ll build the plan around you.